
I hate seeing NullPointerException stack traces in Crashlytics. It directly hurts my ego, especially if it turns out that I could actually find these crashes myself, like this one that I found in StackOverflow application.
However, this is not the worst kind of feedback.
When users post angry reviews about application not working to Google Play, it is much more painful than crash reports. Also much harder to debug because these reviews don’t usually come with a detailed stack trace.
In this post I will show you how to ensure that Android applications handle save and restore flow without crashing, hanging or silently corrupting users data.
Challenges in testing of save and restore:
If you think about it for a minute, save and restore flow is a very complex collaborative interaction (handshake) between the entire application and the operating system.
As such, it can’t be unit tested at all.
Very small and local parts of this flow can probably be tested with Robolectric integration testing. However, I believe that the efficiency of such an approach will be very low and it can even provide a false sense of safety.
The same can be said about instrumented tests on real devices that are scoped to specific Activities. While it is possible to test that the state is saved and restored inside Activities, narrowly scoped tests don’t cover the interactions with the state outside of Activity lifecycle. Majority of this state either associated with Application lifecycle or is a static state like Singletons, both of which are not preserved during save and restore.
So, in order to reliably test save and restore we need to operate at the Android OS level and really cause the entire application to be killed and then restored.
To my best knowledge, there is no automated solutions for this kind of testing (if you do know about any – please correct me in the comments section).
In theory, the manual solutions I will show you below can be combined with operating system level UI testing frameworks, but I haven’t seen this approach being used in practice. In addition, I suspect that ROI of such a testing will be extremely low in practice.
I wouldn’t go as far as saying that you should not write UI tests with sophisticated hooks to test save and restore, but I will say that it might very well be an inefficient time allocation on most projects.
Due to above reasons it is either impossible or difficult and time consuming to test save and restore automatically. Therefore, I usually test this scenario manually.
Manual testing of save and restore:
Manual testing of save and restore boils down to the following sequence of steps:
- Navigate to the screen that needs to be tested inside the application.
- Push the application to background by e.g. clicking on “home” button.
- Initiate application’s save and restore.
- Bring the application back to foreground by e.g. tapping on the launcher icon.
- Verify that the state of the screen was preserved and you can continue a routine interaction with the application.
The really annoying part is that this test flow must be performed for each single screen of the application. Given that I do it manually, this test is quite time consuming.
The last verification step is specific to each application and each screen.
In the simplest case there might even be nothing to verify on some screens. On other screens you might want to verify that UI layout and user input remained the same.
On more complicated screens the verification process can become more nuanced. Screens with lists populated with contents from internet are a good example of such a nuanced verification.
You might be tempted to verify that the list is at the same scrolling position and contains the same elements, but, in practice, it might be a non-optimal implementation choice. In my opinion, a better user experience with such lists is achieved if the list is re-populated with up to date contents from internet after save and restore. Additional complication might be that the scrolling position should be preserved upon list contents update.
And there might be even more complex screens that require even more nuanced verification.
So, the last verification step in save and restore test sequence will be specific to each screen inside your application.
Other steps are not application specific.
Now I just need to tell you how to actually initiate save and restore for the tested application.
I will immediately rule out the idea of just starting many applications until the one we are testing is being killed. This is too time consuming and unpredictable.
More practical approaches are listed below.
Initiation of save and restore programmatically:
Android framework provides a way to initiate save and restore flow programmatically.
To do that you will need to call killBackgroundProcesses(String) method of ActivityManager system service and pass in the package name of the application to be killed.
To do that you’ll need to request special KILL_BACKGROUND_PROCESSES permission.
Mark Murphy wrote a tutorial application called Nukesalot that implements this approach.
While this method can be used in e.g. memory cleaner applications, I don’t think that it is very practical for the purpose of testing.
Initiation of save and restore through Android Studio:
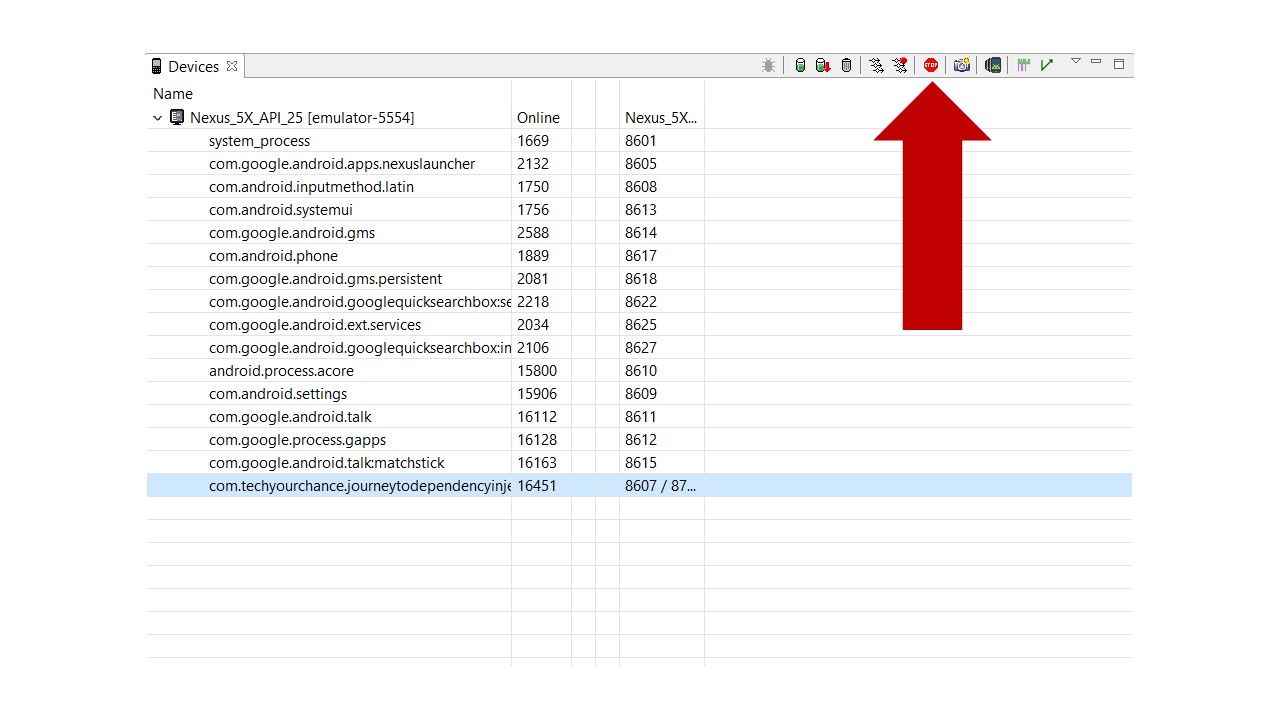
Android Device Monitor, one of the tools available in “Android” category of “tools” menu inside Android Studio, can also be used to kill applications.
To simulate save and restore make sure that the application is in background, then choose it from the shown list of processes and click on “stop process” button as shown in the following image:
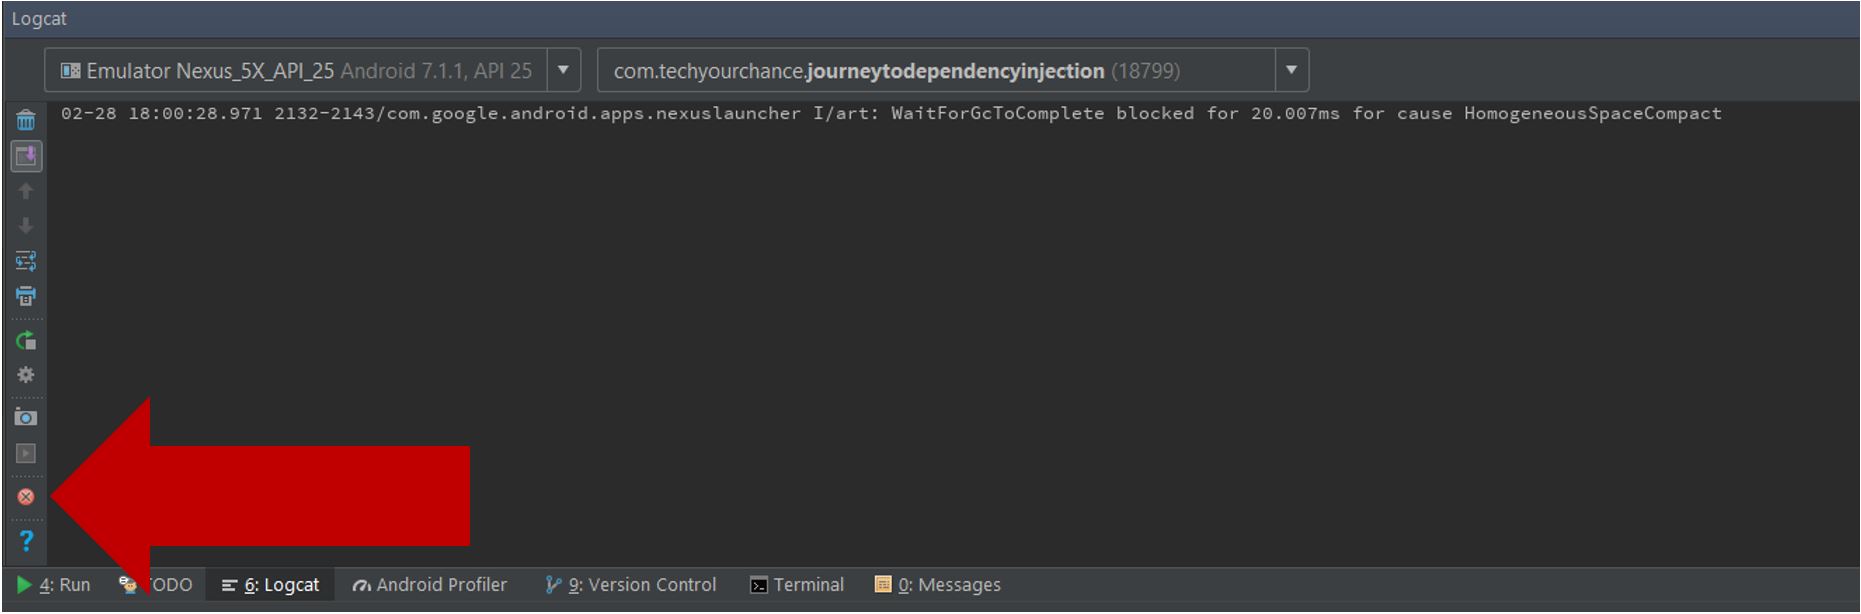
Even simpler, there is “terminate application” button inside “logcat” tab that does the same:
This is relatively convenient way of simulating save and restore, but I never use it in practice (in fact, I would like to thank Reddit user RaisedByTheInternet for bringing this method to my attention).
Initiation of save and restore through ADB:
With this approach you will need to use Android Debug Bridge (ADB) command line interface (maybe there are GUI alternatives out there, but I’m not aware of any).
First of all, ensure that the device is attached to ADB:
- Connect the test device to the computer (Android Studio emulators are usually connected by default).
- Make sure that test device is listed in the output of
adb devices -lcommand.
After that, you can initiate save and restore for the application of interest by using this command:
[code]adb shell am kill <application_id>[/code]
Note that in order for this command to have effect, the application must be in background.
This is the method I use the most in practice.
The best thing about this method is that you can combine this command with two additional ADB commands to automate the flow of going to home screen, then killing the application and then launching it again:
[code]adb shell am start -a android.intent.action.MAIN -c android.intent.category.HOME && adb shell am kill <application_id> && adb shell monkey -p <application_id> -c android.intent.category.LAUNCHER 1[/code]
The amount of time this command saves me is astounding, but, more importantly, it allows me to keep my sanity while meticulously testing save and restore.
Automatic save and restore initiation for all applications:
The last method I want to tell you about will cause all applications to be killed the moment they are pushed to background. Note that I said all applications, as opposed to just the tested application – this method will indeed affect all the applications running on the device.
In order to enable this behavior, you’ll need to go to “Developers Options” settings screen, scroll down to the bottom and set the setting “Limit background processes” to 0.
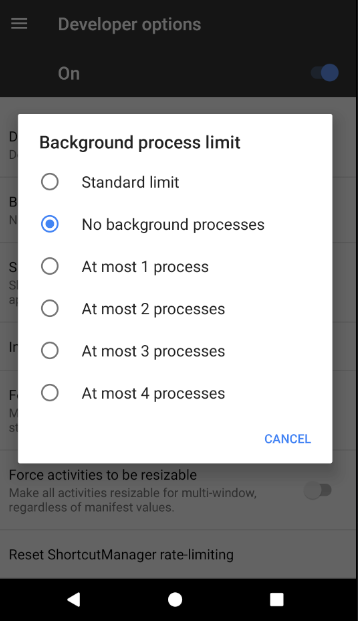
Setting background processes limit to 0 instructs Android OS to eagerly kill all background processes regardless of memory conditions. Therefore, the moment any application will be pushed to background it will be killed.
My personal best practices:
Now I will share with you several “best practices” that work for me in respect to save and restore testing. Maybe they will be a good starting point for you as well.
First of all, I always use at least one device or emulator that has its background processes limit set to 0. Usually that will be the emulator that I use during development.This way I routinely “test” save and restore flow.
Such an “implicit testing” is not robust by any means, but, occasionally, it does catch bugs at an early stage when they are very easy to investigate and fix.
Second, I perform thorough save and restore testing of each new individual screen as part of screen’s “sign off”.
Third, I perform a thorough exploratory testing which includes save and restore checks before releases or after major changes.
What I usually do in this case is killing the application at “points of interest” during regular exploratory testing. Points of interest in this context are the scenarios that I see as risky from save and restore perspective. Note that some of these scenarios might require additional effort to set up (e.g. long server responses, server errors, etc.).
Since there is always a risk of discrepancy in behavior between a real device and an emulator, I only use real devices for screen “sign off” and pre-release testing.
The last and the most important practice is collaboration with QA testers.
If you have QA testers that work with you, chances are that they don’t even know about save and restore flow. Talk to them and explain the importance of testing of save and restore. Or, at the very least, send them link to this article.
Summary:
We started with a discussion of challenges associated with automated testing of save and restore behavior.
Then I described how to test save and restore manually, and demonstrated several ways to cause the application to be killed by Android regardless of memory conditions.
Lastly I listed several best practices that worked for me over the years.
I would like to conclude with a reminder that save and restore is your users everyday reality. Therefore, testing this scenario is absolutely mandatory.
As always, you’re welcome to leave your comments and questions below, and consider subscribing to our newsletter if you liked this post.

Background process limit was a great help!
Killing app from Logcat/Android Monitor won’t trigger save & restore.
Thank you. This give me a great help too